In our previous article (Deploying a Jekyll website to AWS S3 with GitHub Actions and AWS CloudFormation), we setup GitHub Actions to use IAM Secret and Access keys to deploy our blog to S3 and invalidate our CloudFront distribution cache.
This is the traditional approach to accessing AWS resources, but we’re going to look at migrating to OpenID Connect (OIDC) to reduce our risk of credential exposure and simplify credential management.
Setting up OIDC in AWS
Create an OIDC provider for GitHub
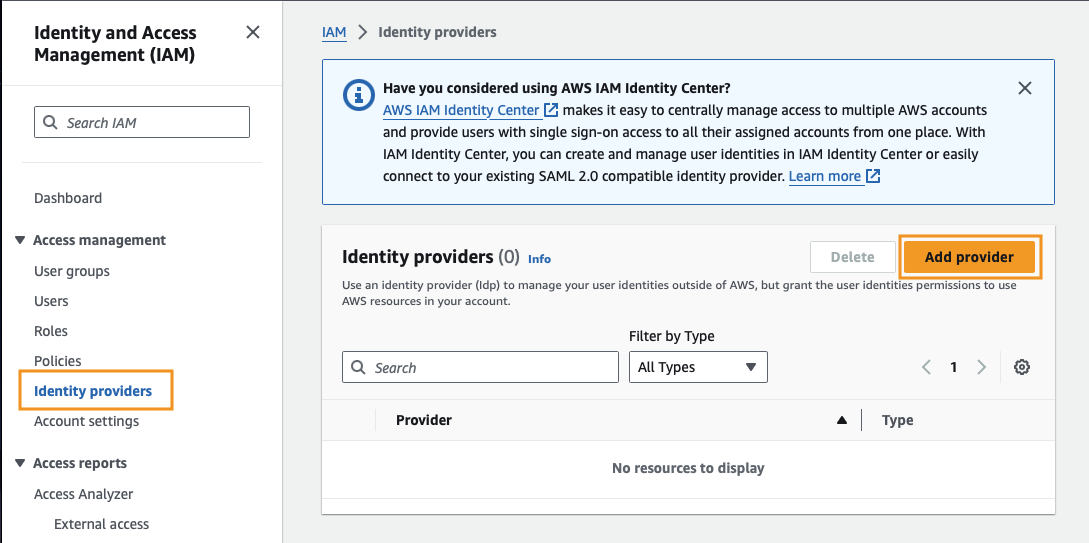
After navigating to the IAM dashboard in the AWS Console, click on Identity providers, then click Add provider.
We want to create an OpenID Connect provider with the following details:
- Provider URL:
https://token.actions.githubusercontent.com - Audience:
sts.amazonaws.com
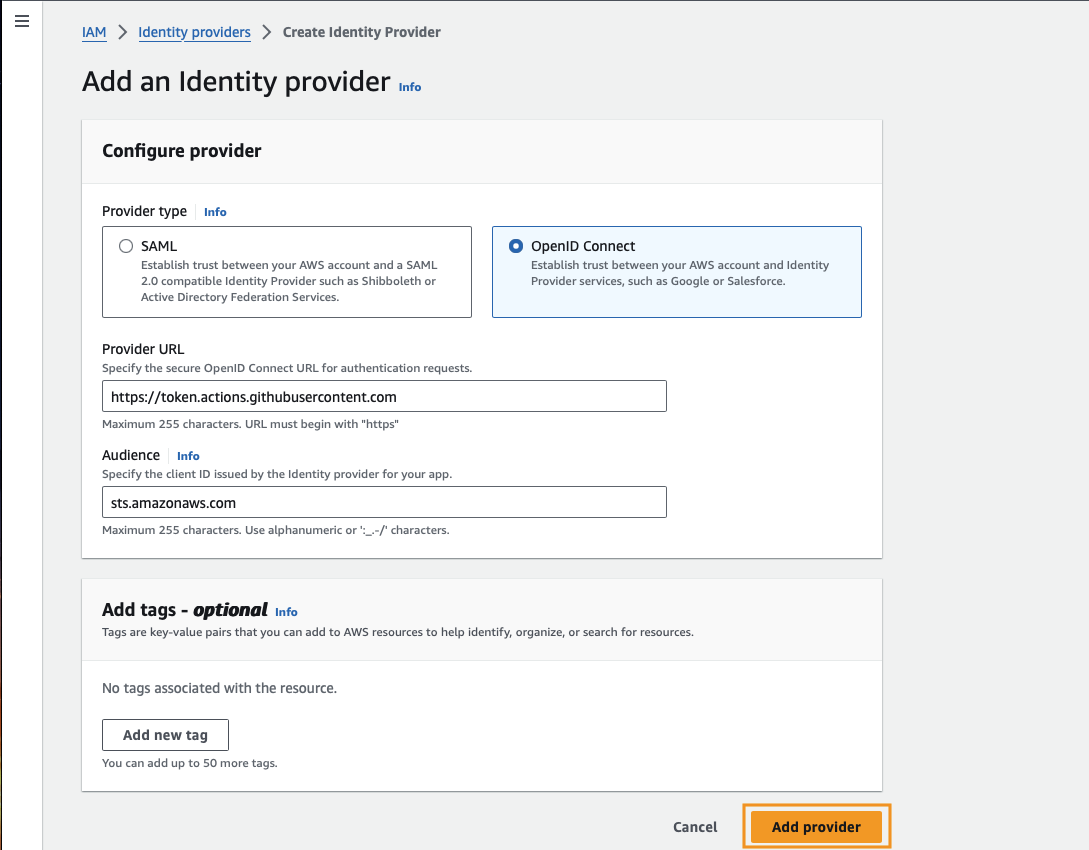
Once redirected to the Identity Providers page, select your newly created provider and make note of its ARN.

Create an IAM role
At this point, we’ll create an IAM role that leverages this new identity provider using a trust policy and assign the minimum level of permissions to the role that we need.
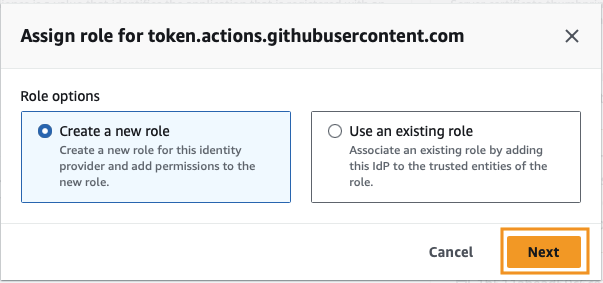
Clicking the Assign role button under our identity provider will automatically populate the identity information in the dialog.

We want to create a new role.
At this screen, Web Identity and Identity Provider should automatically be selected. Ensure you select your Audience from the dropdown.
At the very least, you’ll need to enter the GitHub organization. If you have an individual account, the “organization” will be the name of your individual account. Additionally, if you want, you can limit the access of the identity to a specific repository and branch. I would recommend at least restricting to a specific repository.
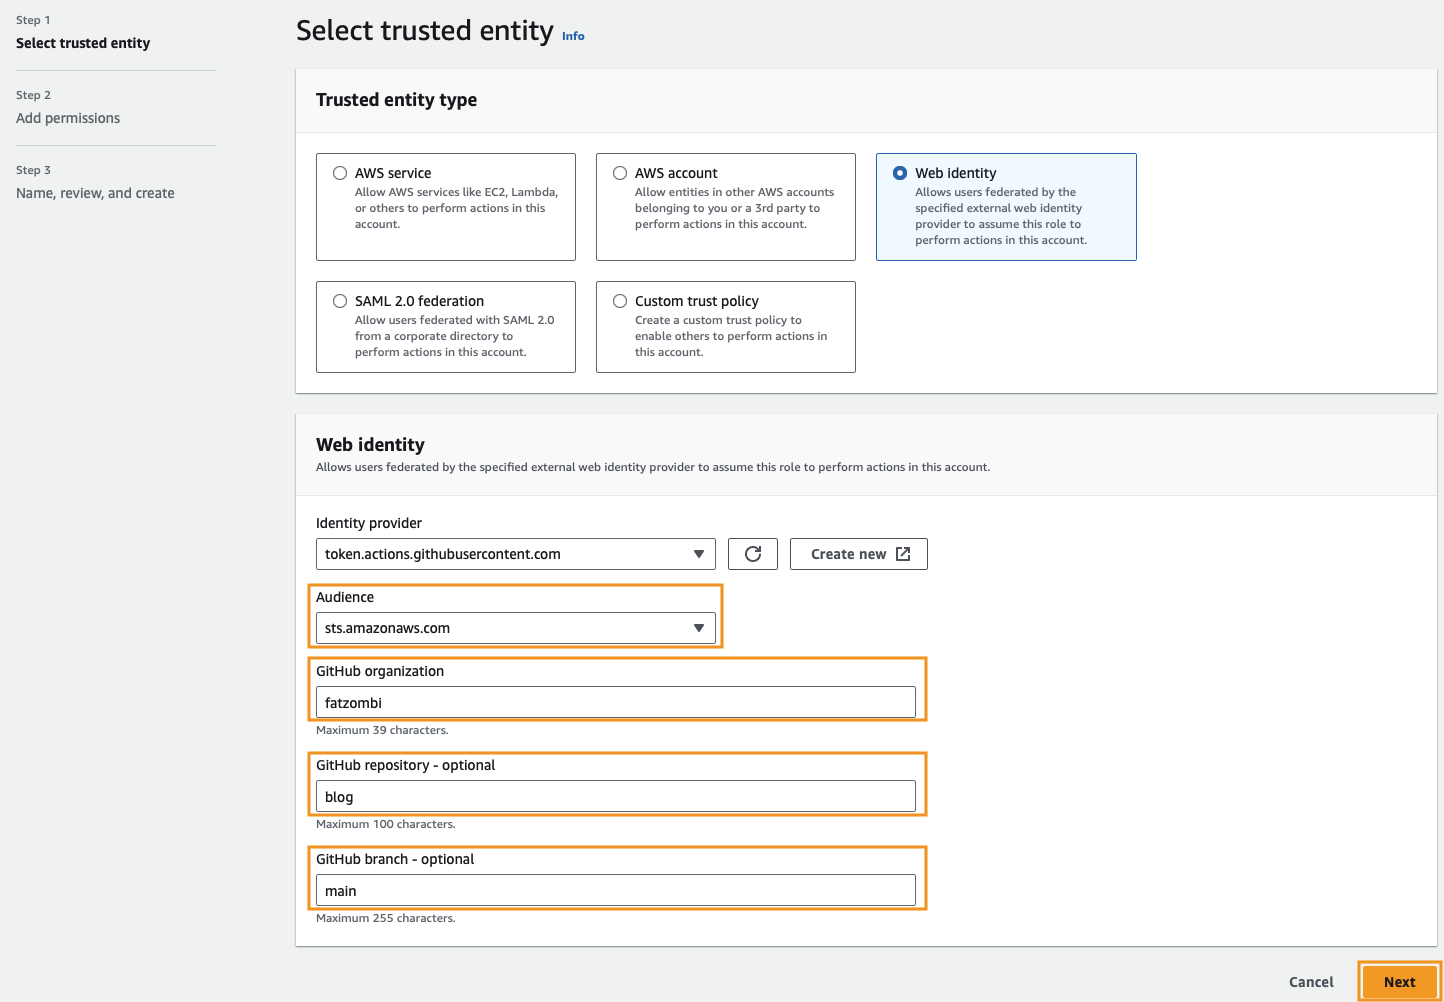
Click Next on the Add permissions step as we’ll create our own policy in a later step.
Scope the trust policy
We can name our role and click the Create role button. The Trust policy should automatically be populated with the Identity Provider and GitHub organization/repo/branch information that was entered previously.
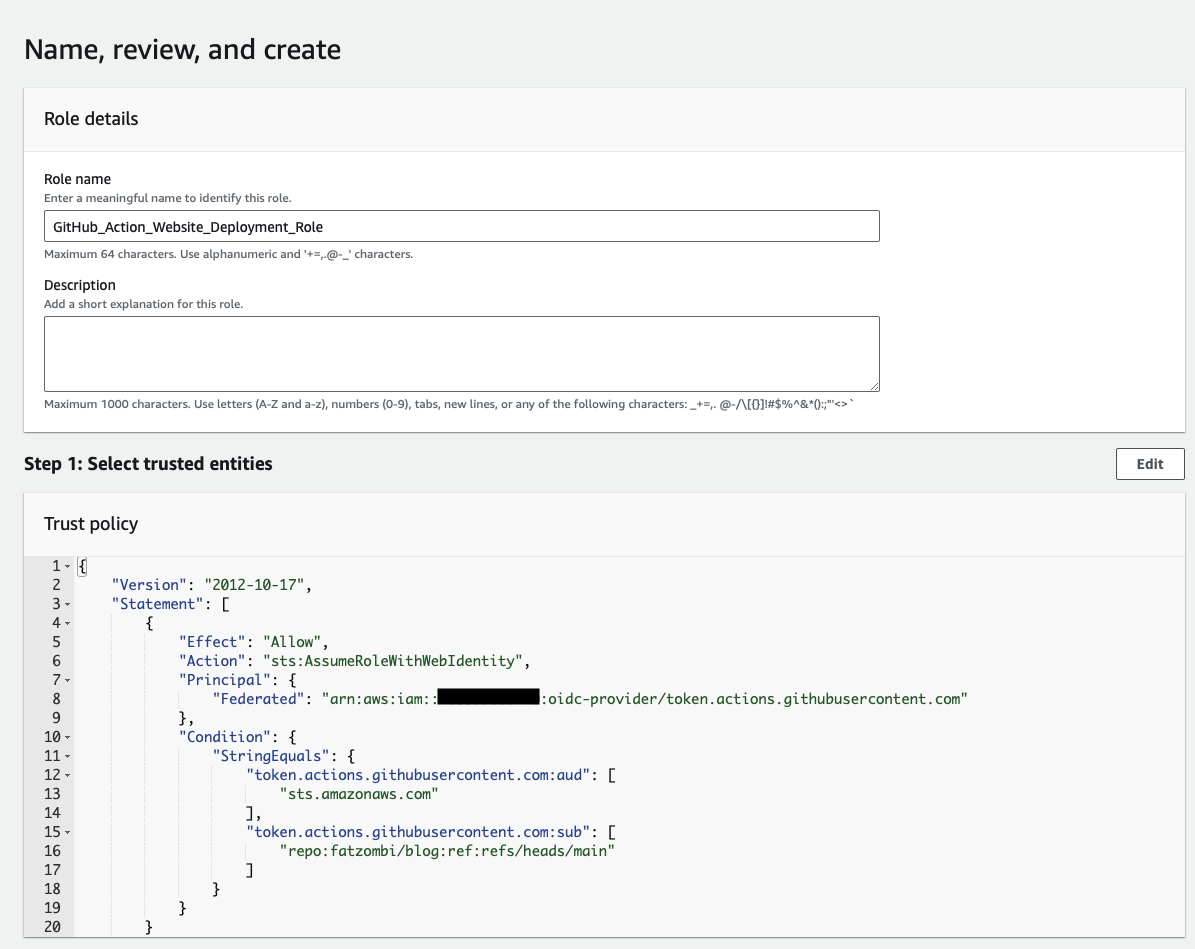
Assign permissions
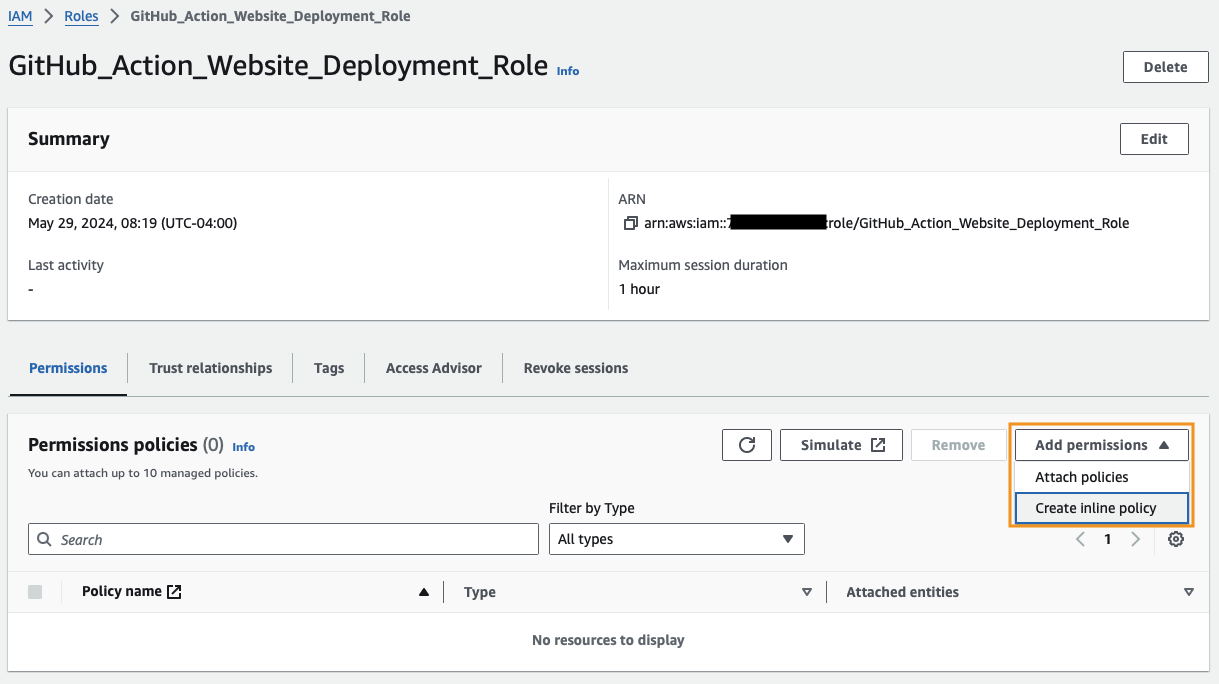
Navigate to your newly created IAM role.
Make note of the ARN, as that’s what we’ll need to provide to our GitHub Action.
Select Create inline policy under the Add permissions dropdown in the Permissions policies section.
Clicking JSON, will bring us to the policy editor, where we can paste in the following policy that will limit our access to a specific S3 bucket and CloudFront distribution.
{
    "Version": "2012-10-17",
    "Statement": [
        {
            "Effect": "Allow",
            "Resource": [
                "arn:aws:s3:::fatzombi.com",
                "arn:aws:s3:::fatzombi.com/*"
            ],
            "Action": [
                "s3:PutObject",
                "s3:GetObject",
                "s3:DeleteObject",
                "s3:ListBucket"
            ]
        },
        {
            "Effect": "Allow",
            "Resource": "arn:aws:cloudfront::ACCOUNTID:distribution/DISTRIBUTION_ID",
            "Action": [
                "cloudfront:CreateInvalidation",
                "cloudfront:GetDistribution"
                ]
        }
    ]
}
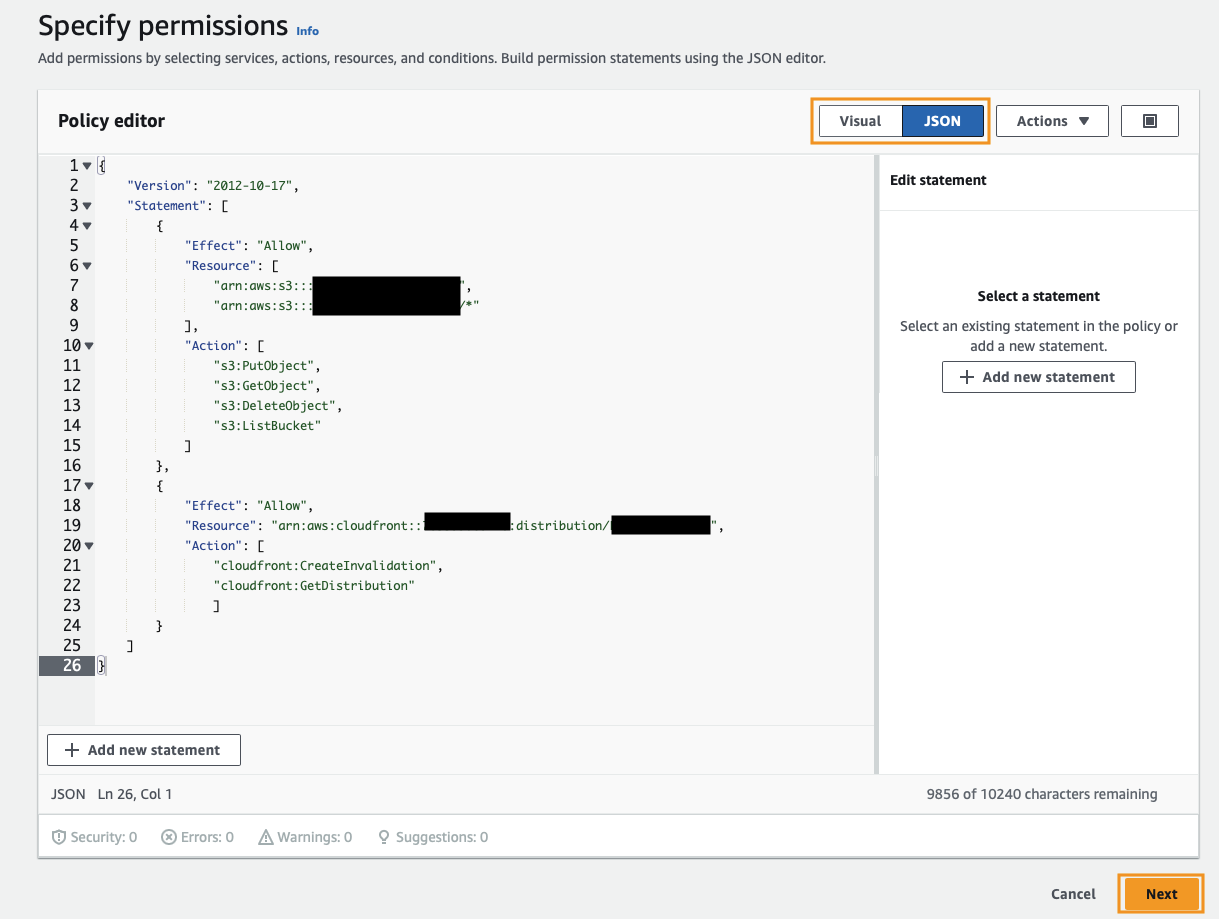
Click Next, provide a name for our policy, then click Create policy.
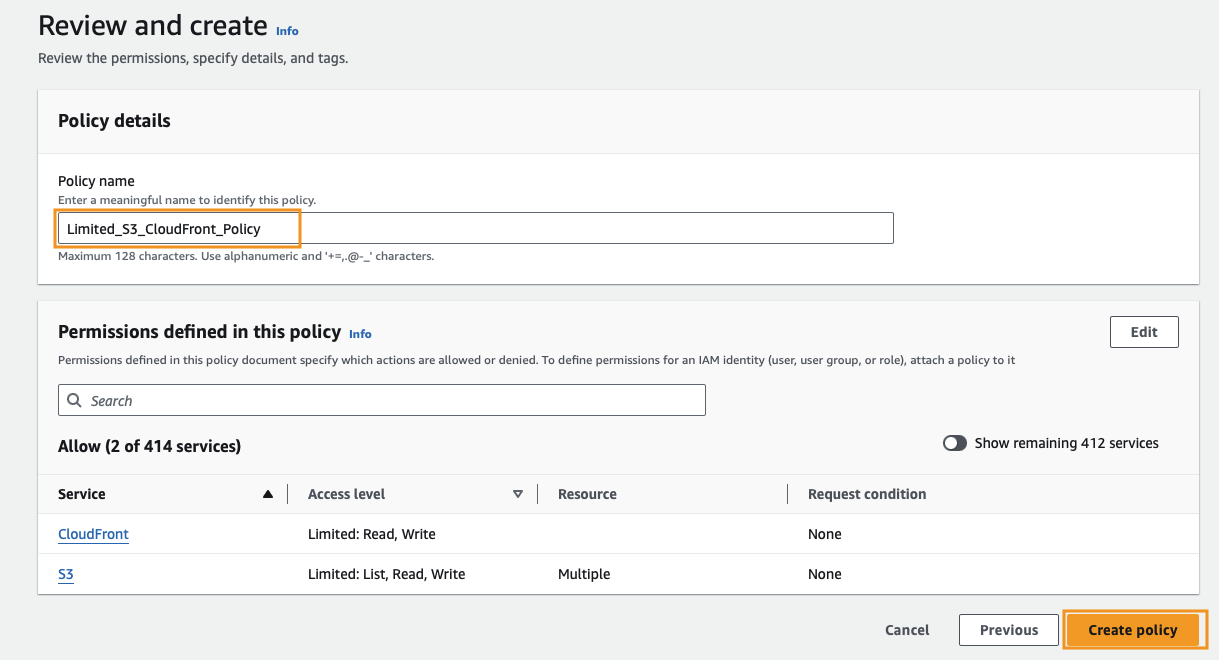
We now have a role with only the minimum level of access needed to deploy our files to S3 and invalidate the CloudFront cache.
Modifying GitHub Actions Workflow
For reference, our original GitHub Action file consists of the following:
name: Deploy Website

on:
  workflow_dispatch:
  push:
    branches:
      - main

jobs:
  build:
    runs-on: ubuntu-latest
    steps:
    - uses: actions/checkout@v3
    - name: Build the site in the jekyll/builder container
      run: |
        docker run \
        -v ${{ github.workspace }}:/srv/jekyll -v ${{ github.workspace }}/_site:/srv/jekyll/_site \
        jekyll/builder:latest /bin/bash -c "chmod -R 777 /srv/jekyll && jekyll build --future"

    - name: Configure AWS Credentials
      uses: aws-actions/configure-aws-credentials@v1
      with:
        aws-access-key-id: ${{ secrets.AWS_ACCESS_KEY }}
        aws-secret-access-key: ${{ secrets.AWS_SECRET_ACCESS_KEY }}
        aws-region: us-east-1

    - name: Deploy to S3
      run: |
        aws s3 sync _site s3://fatzombi.com --acl public-read --delete

    - name: Invalidate CloudFront Cache
      run: |
        aws cloudfront create-invalidation --distribution-id ${{ secrets.CLOUDFRONT_DISTRIBUTION }} --paths "/*"
The bulk of the changes with our new setup will be to the Configure AWS Credentials step, however we also need to add an additional block to our job so that it’s able to request an OIDC token and read our repository.
- name: Configure AWS Credentials
        uses: aws-actions/configure-aws-credentials@v2
        with:
          role-to-assume: ${{ secrets.AWS_IAM_ROLE_ARN }}
          role-session-name: github-fatzombi-action
          aws-region: us-east-1
To summarize the changes of this step, we have:
- Upgraded to the @v2 library.
- Removed the
aws-access-key-idandaws-secret-access-keyproperties. - Added two new properties
- role-to-assume: which is the ARN of our IAM role we created previously.
- role-session-name: which is a unique identifier for the OIDC session that is created.
Lastly, we need to add a permissions block to our job, which grants the job permission to request an OIDC token and read our repository.
 permissions:
      id-token: write
      contents: read
This bring our entire GitHub Action contents to the following:
name: Deploy Website

on:
  workflow_dispatch:
  push:
    branches:
      - main

jobs:
  build:
    runs-on: ubuntu-latest

    permissions:
      id-token: write
      contents: read

    steps:
    - uses: actions/checkout@v3
    - name: Build the site in the jekyll/builder container
      run: |
        docker run \
        -v ${{ github.workspace }}:/srv/jekyll -v ${{ github.workspace }}/_site:/srv/jekyll/_site \
        jekyll/builder:latest /bin/bash -c "chmod -R 777 /srv/jekyll && jekyll build --future"

    - name: Configure AWS Credentials
      uses: aws-actions/configure-aws-credentials@v2
      with:
       role-to-assume: ${{ vars.AWS_IAM_ROLE_ARN }}
       role-session-name: github-fatzombi-action
       aws-region: us-east-1

    - name: Deploy to S3
      run: |
        aws s3 sync _site s3://fatzombi --acl public-read --delete

    - name: Invalidate CloudFront Cache
      run: |
        aws cloudfront create-invalidation --distribution-id ${{ vars.CLOUDFRONT_DISTRIBUTION }} --paths "/*"
Testing the new setup
Commit the changes and we should see a successful deployment.
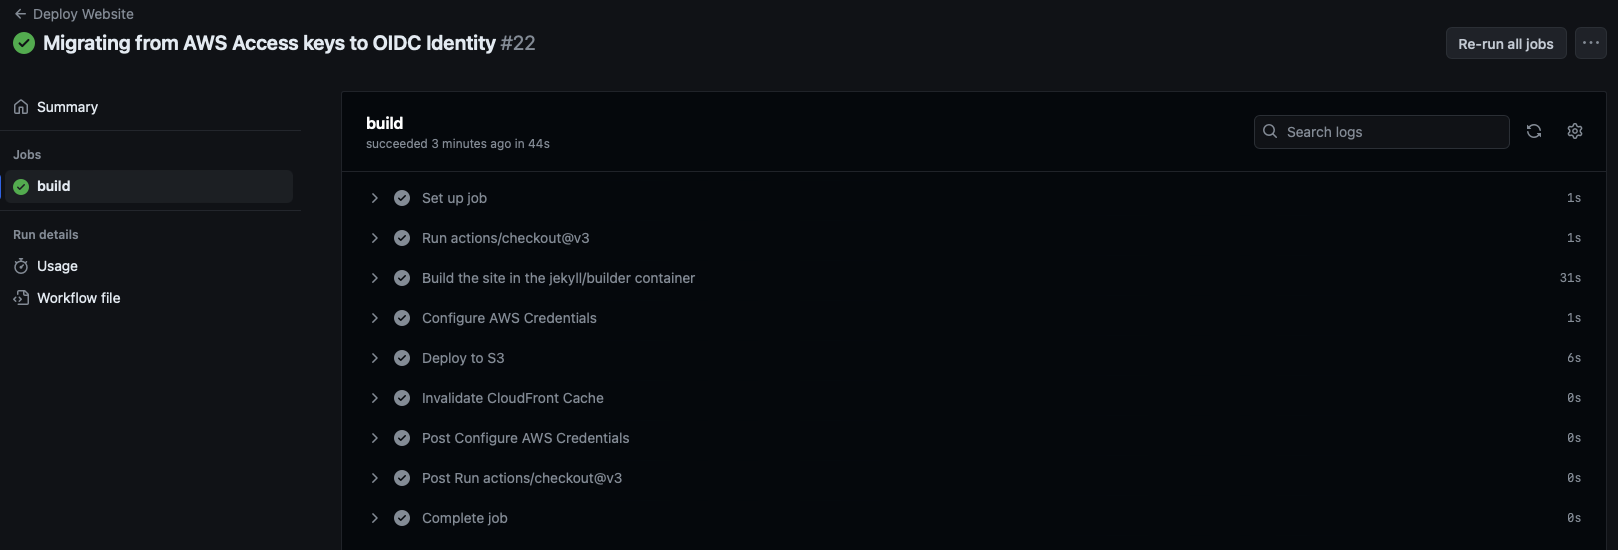
Now, you can go ahead and delete the AWS_ACCESS_KEY and AWS_SECRET_ACCESS_KEY repository secrets and delete the associated user in AWS, if it was solely used to deploy your blog.
Conclusion
Migrating from IAM secret and access keys to OpenID Connect (OIDC) for our GitHub Actions workflow helps enhance the security and management of our deployment.
By leveraging OIDC over the traditional IAM methods, we reduce the risk of credential exposure and simplify the process of managing access permissions.
I hope this guide has been helpful in your journey to modernize your AWS deployment practices. If you have any questions or feedback, feel free to reach out. Happy deploying!