Picking back up where we left off in Part 2 of our homelab automation series, we now have Terraform creating our minimally configured VMs. However, installing and configuring software and settings on VMs can still be a tedious and time-consuming task, especially if you have many VMs and services to manage. This is where Ansible comes in.
Overview of Ansible
Ansible is an open source infrastructure as code tool that allows you to provision software, perform configuration management, and handle application deployments. Similar to Terraform, it uses a declarative language that is simple to write. Additionally, there are thousands of modules, most can be found at https://docs.ansible.com/ansible/latest/collections/index_module.html. In this article, we will explore how to use Ansible to automate the configuration of our VMs.
If you want to skip ahead, you can find the Ansible playbook over at https://github.com/fatzombi/ansible-homelab.
Our Current VM setup
If you’re following along through all the parts of this series, there is one modification that I made since the previous article. This change replaces the HomeBridge VM with a new host with the sole purpose of running docker contains, since that is very popular inside homelabs. You can either browse the repository listed above or copy the pihole.tf file and save it as docker.tf and make the necessary modifications todocker.tf and vars.tf file.
Additionally, if you’re following along with this article, you may see a 10.0.5.x network referenced in screenshots, due to a collision on my production network. Wherever you see this, assume the network is 192.168.1.x per our configuration.
Configuring Ansible on Proxmox
Proxmox doesn’t ship with Ansible, but it is in the Debian repositories. We can quickly install it by running the following:
apt install ansible
Now, let’s create a directory that will contain our Ansible playbook and configuration, ensuring we create it as a git repository so that we can track changes over time.
mkdir ansible-homelab
cd ansible-homelab
git init
OR, if you like, you can clone the entire playbook.
git clone https://github.com/fatzombi/ansible-homelab
cd ansible-homelab
Creating an Ansible playbook
- Define our inventory. This is the collection and grouping of hosts which we want to execute our playbook against.
- Configure settings for how Ansible will talk to each of the hosts.
- Create a playbook that defines the relationships between our hosts and the roles we will define in the next step.
- Create roles for our servers. a. Debian role, this is our base role that we want applied to all our servers. b. PiHole role, this is a service specific role that will configure our PiHole server. c. Docker role, this is a service specific role that will configure our Docker host.
The Inventory
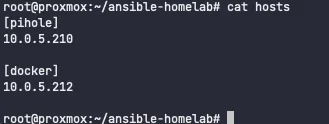
First off, we need to define the inventory of our hosts that Ansible will run tasks against. While there are modules which allow a dynamic inventory to be provided by Terraform, we will be statically defining our inventory for this article.
echo -e "[pihole]\n192.168.1.210\n" >> hosts
echo -e "[docker]\n192.168.1.212\n" >> hosts

Ansible Configuration
Based on our setup, we need to modify a couple of settings that Ansible will use to communicate with our servers.
Ansible will read files from a group_vars directory. These files are where we can define variables which can be used throughout our playbook. The variables can be applied to all hosts, or we can associate the variables with specific roles. For example, we can define DNS_SERVER_1 for all hosts, and we could define SQL_DEFAULT_PASSWORD specifically for hosts that inherit the database role of database.
For this article, we will apply a minimal configuration, such that Ansible uses Python3 and SSH.
mkdir group_vars
echo "ansible_connection: ssh" >> group_vars/all
echo "ansible_python_interpreter: /usr/bin/python3" >> group_vars/all
Defining our Playbook
For simplicity, we will have a Debian role, which is applied to all of our servers, then we will define individual roles for each additional server. Notice, we can make use of the all value for the hosts definition in our first task.
To achieve this, we need to create the following contents in a playbook.yml file.
---

- name: Ansible playbook for all our hosts
  hosts: all
  roles:
    - debian
  remote_user: debian
  become: yes

- name: Ansible playbook for configuring pihole
  hosts: pihole
  roles:
    - pihole
  remote_user: debian
  become: yes

- name: Ansible playbook for configuring homebridge
  hosts: homebridge
  roles:
    - homebridge
  remote_user: debian
  become: yes

- name: Ansible playbook for configuring docker
  hosts: docker
  roles:
    - docker
  remote_user: debian
  become: yes
Configuring tasks
Debian tasks
Often there is software which you’d like installed on all your hosts. While this could have been handled inside the base cloud-init image, it isn’t always the best option for several potential reasons.
Therefore, this will be the core function of our debian role. We want to update apt and install a few packages across all our hosts.
mkdir -p roles/debian/tasks
Now we can place the following contents inside roles/debian/tasks/main.yml.
---
- name: 'Update APT package cache'
  apt:
    update_cache: yes
    upgrade: safe

- name: Install packages
  apt:
    package:
      - git
      - apt-transport-https
      - ca-certificates
      - wget
      - software-properties-common
      - gnupg2
      - curl
      - python3-pip
    state: present
Pihole tasks
Whether you’re familiar with the PiHole installation process, there are several steps that we must take.
- Cron must be installed on our host.
- We need to clone the PiHole repo.
- Create a setupVars.conf configuration file.
- Install PiHole.
- Reboot PiHole.
- Then we’d go ahead and configure our DNS to use PiHole.
mkdir -p roles/pihole/tasks/
Now we can place the following contents inside roles/pihole/tasks/main.yml.
---

- name: Install packages
  apt:
    package:
      - cron
      - git
    state: present
  tags: pihole

- name: 'Clone pihole repo'
  ansible.builtin.git:
    repo: 'https://github.com/pi-hole/pi-hole'
    dest: /home/debian/pi-hole
  tags: pihole

- name: 'Create pihole config directory'
  file: path=/etc/pihole/ state=directory
  tags: pihole

- name: 'Copy setupVars.conf'
  copy: src=templates/setupVars.conf.j2 dest=/etc/pihole/setupVars.conf
  tags: pihole

- name: 'Install pi-hole'
  ansible.builtin.shell: ./basic-install.sh --unattended
  args:
    chdir: "/home/debian/pi-hole/automated install"
  tags: pihole

- name: 'Reboot'
  shell: sleep 2 && reboot
  async: 1
  poll: 0
  ignore_errors: true
  tags: pihole

- name: "Wait for server to come back"
  local_action: wait_for host={{ ansible_host }} port=22 state=started delay=10
  become: false
But, as you can see, we referenced a templates/setupVars.conf.j2 file. In our ansible-homelab directory, we’ll create a new directory called templates to house this file.
mkdir templates/
touch templates/setupVars.conf.j2
This file should contain your own configuration for PiHole. For this article, you can use the following basic configuration. The password encrypted here is pihole.
QUERY_LOGGING=true
INSTALL_WEB=true
WEBPASSWORD=5536c470d038c11793b535e8c1176817c001d6f20a4704fa7908939be82e2922
Docker tasks
Now with our Docker host, we will need to install the Docker engine, setup a docker-compose.yml to configure our containers, then run docker-compose to start the containers.
mkdir -p roles/docker/tasks/
mkdir -p roles/docker/templates/docker_data
touch roles/docker/tasks/main.yml
The contents of main.yml are as follows:
---

- name: Add Apt signing key from official docker repo
  apt_key:
    url: https://download.docker.com/linux/debian/gpg
    state: present

- name: add docker official repository for Debian Bullseye
  apt_repository:
    repo: deb [arch=amd64] https://download.docker.com/linux/debian bullseye stable
    state: present

- name: Index new repo into the cache
  become: yes
  apt:
    name: "*"
    state: latest
    update_cache: yes
    force_apt_get: yes

- name: actually install docker
  apt:
    name: "docker-ce"
    state: latest

- name: Install docker-compose
  get_url:
    url: https://github.com/docker/compose/releases/download/v2.2.3/docker-compose-linux-x86_64
    dest: /usr/local/bin/docker-compose
    mode: 'u+x,g+x'

- name: install docker pip package
  pip:
    name:
      - docker
      - docker-compose
  tags: docker

- name: create directory to house our docker-compose
  file:
    path: /home/debian/docker/
    state: directory
    owner: debian
    group: debian
  tags: docker

- name: copy docker-compose.yml
  copy:
    src: templates/docker.conf.j2
    dest: /home/debian/docker/docker-compose.yml
    owner: debian
    group: debian
  tags: docker

- name: create docker_data directory
  file:
    path: /home/debian/docker/docker_data/
    state: directory
    owner: debian
    group: debian
  tags: docker

- name: copy supporting files
  copy:
    src: roles/docker/templates/docker_data/
    dest: /home/debian/docker/docker_data/
    owner: debian
    group: debian
  tags: docker

- name: Run docker-compose
  docker_compose:
    project_src: /home/debian/docker/
    build: no
  tags: docker
The docker_data subdirectory can contain whatever files you want to bring over for your docker configuration. This could contain additional configuration files for containers you have defined in your docker.conf.j2 template.
version: "3.7"

services:
    portainer:
      container_name: portainer
      image: portainer/portainer-ce:latest
      restart: unless-stopped
      ports:
        - 8000:8000
        - 9000:9000
      volumes:
        - /var/run/docker.sock:/var/run/docker.sock
        - /home/debian/docker/docker_data/:/data
Running our playbook
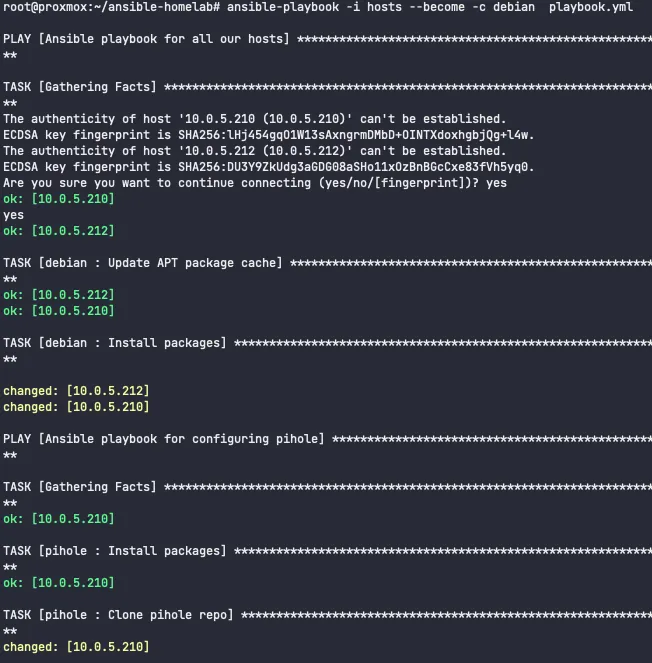
All of that hard work will pay off as soon as we execute the following command. Again, ignore any 10.0.5.x addresses in the screenshots or command output. For this article, that is equivalent to 192.168.1.x.
ansible-playbook -i hosts --become -c debian playbook.yml
If you receive any errors, you can add -vvv to the previous command for verbose output.

Once the command has completed, we’ll receive a play recap. This is an aggregated summary of the status of our tasks executed.

If we navigate to http://192.168.1.210/admin, we will be presented with the pihole login page. Again, pihole was the encrypted password
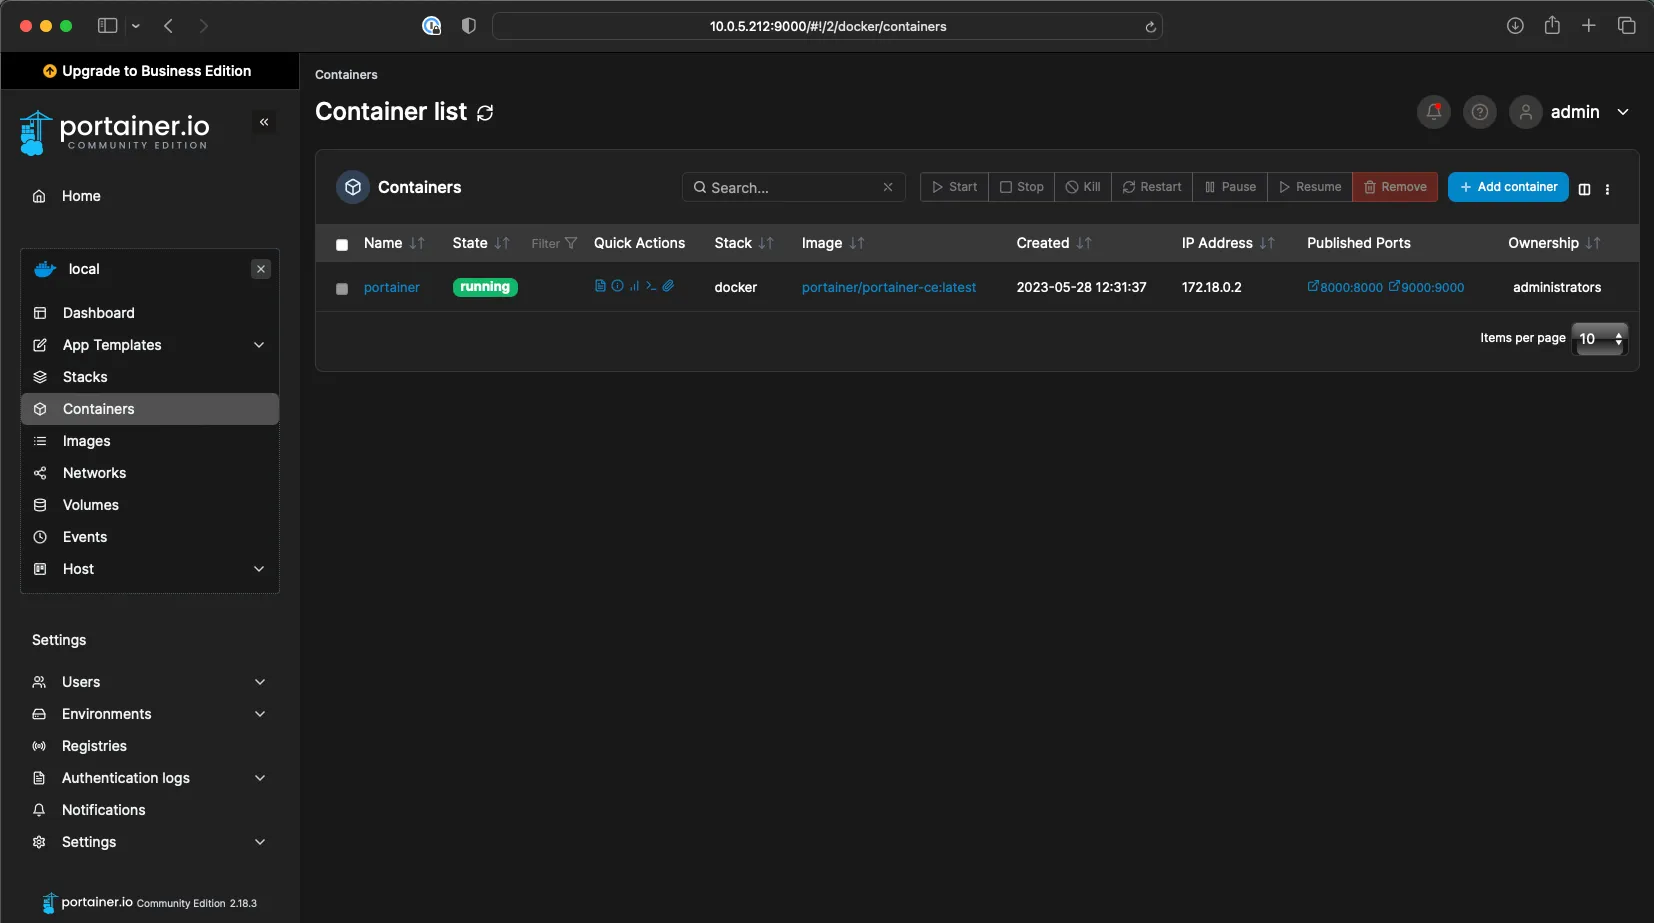
Additionally, if we navigate to http://192.168.1.212:9000/, we will be presented with Portainer’s initial password setup screen, from there we can access our containers inside Portainer.

Future developments
- Make use of Ansible Secrets. While the pihole password was encrypted, its value is still stored in version control.
- Explore more modules for specific uses. For example, the ssh_config and user_module modules.
- Implement more containers under docker-compose. For example, implement a reverse proxy such as traefic to access all your services by subdomain.
- Implement a CI/CD pipeline.
- Look into Ansible Tower
Conclusion
In conclusion, I hope you have seen the value of using automation to build our homelab up with infrastructure as code. This three-part series hopefully has provided you with a solid foundation for building and managing your homelab environment. With Ansible as a powerful tool in your arsenal, you can now automate repetitive tasks, ensure consistent configurations, and scale your homelab with ease. Embrace the possibilities and continue to enhance (or break) your homelab!